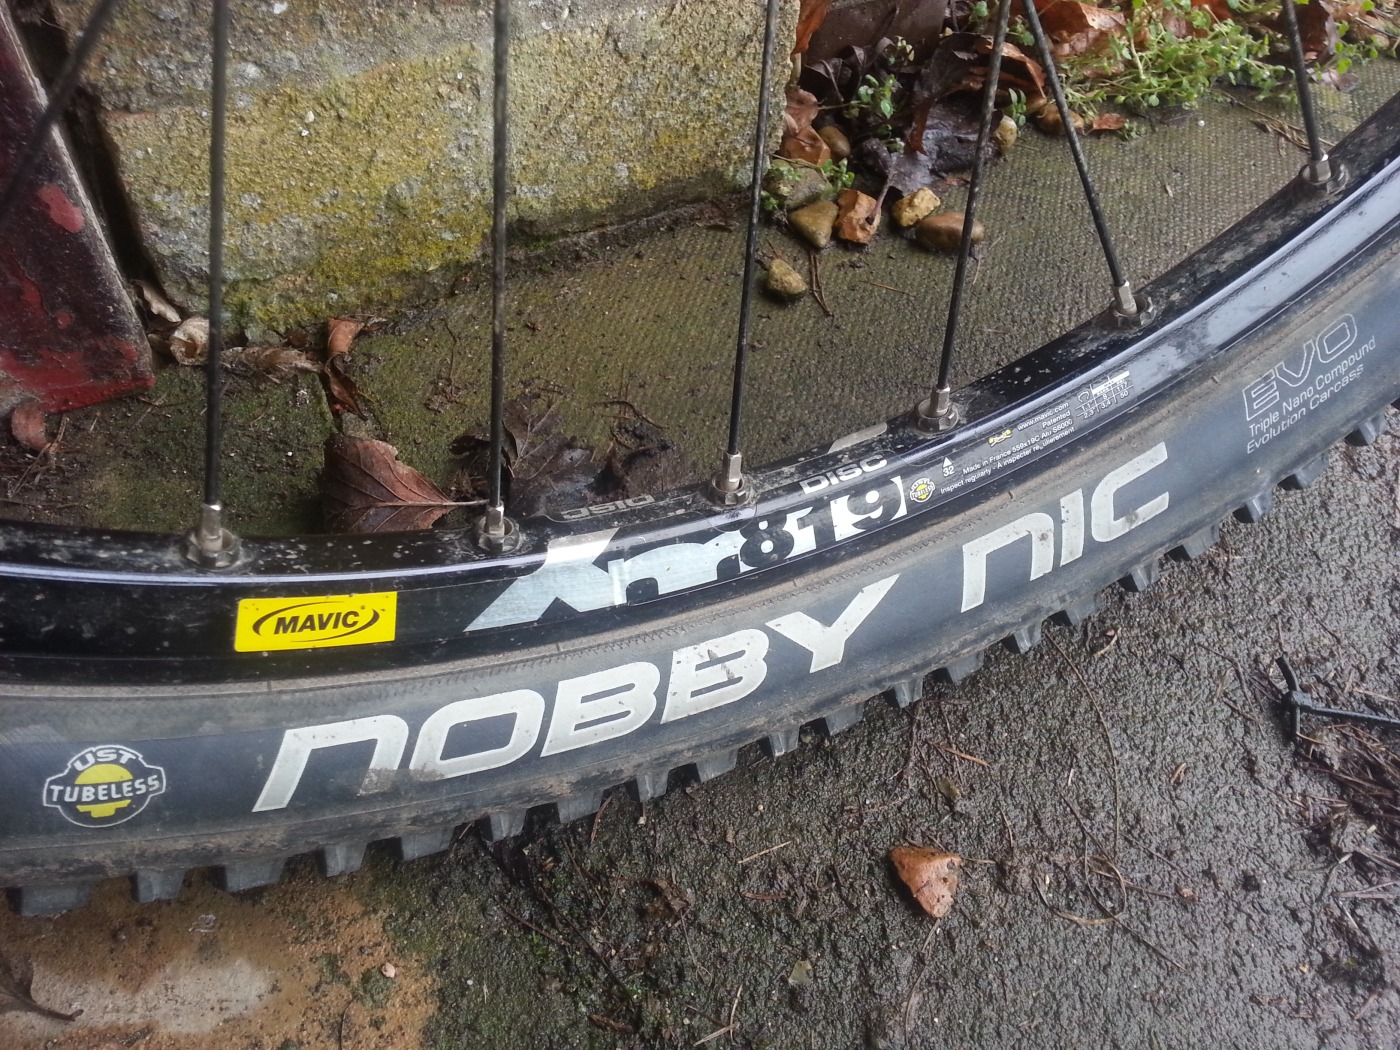
One of the great advantages of having tubeless tyres is that you can ride over thorns, have them stick into your tyre and still continue your ride. Tubeless tyres don’t magically make those thorns disappear though and in some cases air will slowly seep out from around the thorn. So taking some maintenance time to pull them out is a good idea.

MuddyGoose is currently out of action due to seized and worn jockey wheels, so this has provided me with the opportunity to do a bit of maintenance. Although the temptation to just ride Podgy instead is now there and with Podgy being new it’s a strong temptation. But I did resist, aren’t I good!

Anyway, I got my needle nose pliers out and set about pulling thorns. On this occasion it only amounted to a tiny total of two thorns. If you’ve been riding on the thorns for several weeks then they do get quite well embedded into the tyre casing, this can make it tricky to pull them out but with a little perseverance and some decent pliers they do pull out fine from the outside. I’ve never needed to push them through from inside yet; this is good because it means that I never have to remove the tyre from the rim and reseal it afterwards.
If you pull the thorns out with the tyre pumped up then you’ll hear a rush of air as you pull them out; sealant for tubeless tyres pools at the bottom and you’ll be pulling thorns from the top. So after pulling them out you need to swish the sealant around to the puncture holes which causes them to seal up. I do this by positioning the hole at the very bottom of the wheels rotation. My holes were both on the edge of the tread so I also had to lean the wheel against the wall at a suitable angle to get the sealant pooling over the holes. Once you get the sealant in the right place the hiss sound of air escaping becomes a gurgle sound and then eventually stops as the hole seals. It takes a few moments to happen, maybe 30 seconds or so, but it’s satisfying to hear the “psst” disappear. This time around I even got a short squirt of sealant out of one of the holes; you might want to place the wheel on a rag, do it outside or like me – in the garage.

Once finished there will be a couple of wet sticky patches on the outside of your tyre. This is obviously where the sealant has oozed out and done it’s job; clean this up if you like. I don’t bother, it doesn’t attract dirt particularly and after one ride the tyres look their usual muddy selves. Finish off with pumping up to your riding pressures as you will have lost some air; I ride with ~30 psi front and ~35 psi rear. So far I am yet to have a hole that doesn’t repair itself this way, if you do, then apparently you can attach a stick-on puncture repair patch to the inside of the tyre.


Leave a comment